Sharing a trip

When a trip is planned, OrientME turns it into a clean, presentable view you can read in-app, share with a link, email, or save as a PDF. It’s the same itinerary, minus the editing chrome — and money is never included.
The trip view
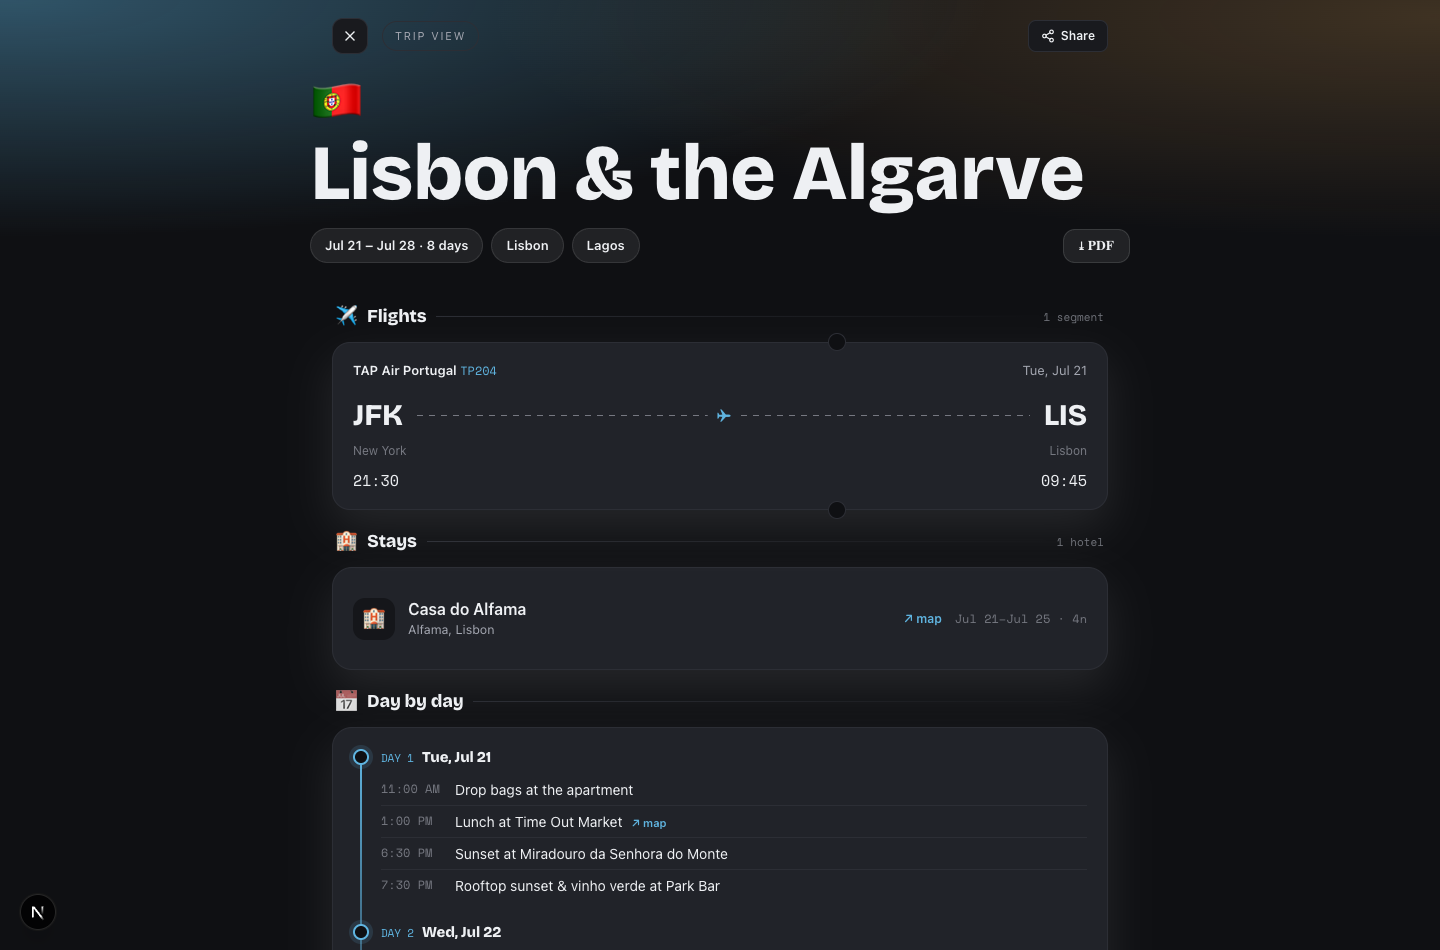
On any trip, click View to open the consolidated read-out: a boarding-pass-style list of flights, your stays and transport, and a day-by-day timeline of activities with times and map links. Use the PDF button (it prints through your browser’s Save as PDF) to take it offline or hand it to someone.
Share a read-only link
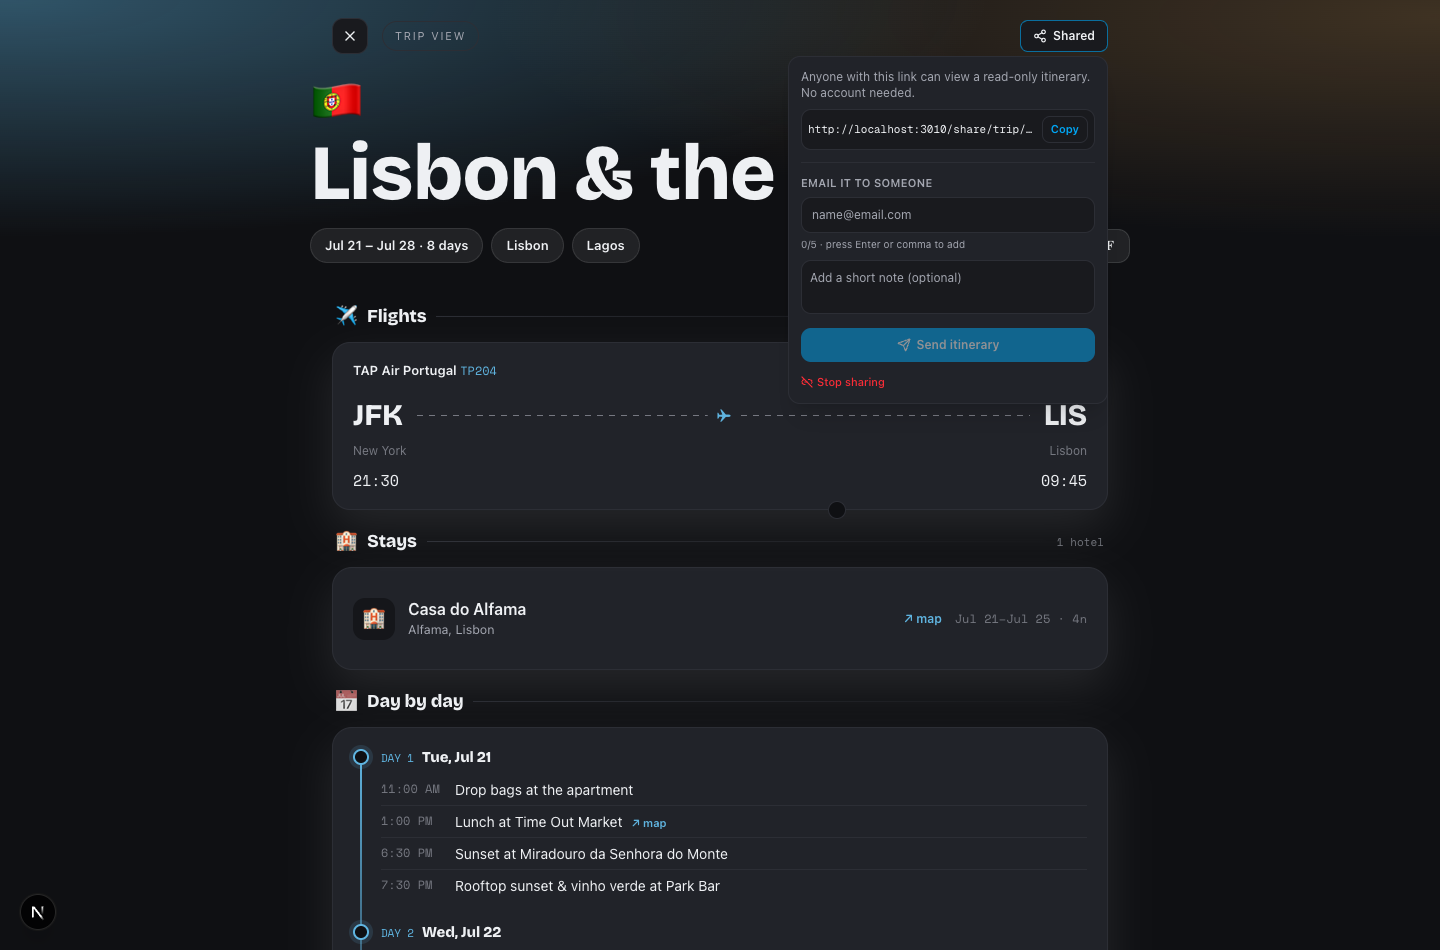
Click the Share button on the trip to generate a public link. Anyone with it can read the itinerary — no account needed — and it always shows the current version, so edits you make afterward appear automatically. Once a link exists the button reads Shared; click it to reopen the popover, then click Copy to grab the link.
To stop sharing, click Stop sharing; the link immediately stops working.
The public page is read-only and clearly labeled as a shared itinerary. Prices, budgets, expenses, and private notes are never shown — only your flights, stays, transport, and the day-by-day plan.
If the person you share with likes what they see, the page includes a Get started button (and the OrientME wordmark links the same way) so they can sign up and start planning trips of their own.
Email it
The same Share popover includes an Email it to someone composer: add up to five recipients (press Enter or comma after each), write an optional short note, and click Send itinerary. Each person gets a branded summary with the counts of flights, stays, and days (never amounts) and a button to the live shared page. If the trip wasn’t shared yet, sending the email turns sharing on for you. If a message can’t reach one of the addresses, the rest still go through.
Sharing with a workspace is different
There are two kinds of “share” for trips, and they do different things:
| Action | Who sees it | What they can do |
|---|---|---|
| Share link / email (above) | Anyone with the link | Read-only, no account, no money shown |
| Share to workspace | Your workspace teammates | Open the full trip, edit it, and add their own expenses |
Use the public link to show a friend your plans; use workspace sharing to plan a trip together.
To share a trip to a workspace, open your trips list, hover the trip, and click its share icon — then pick a workspace in the Share trip dialog (or choose Personal (unshare) to bring it back to just you). This control only appears once you belong to at least one workspace.
Splitting expenses doesn’t require a workspace. The People on this trip roster lets you add anyone — by name — and split costs with them whether or not the trip is shared. Sharing to a workspace simply pre-fills your teammates as real members so you don’t have to type their names. See Workspaces for how membership works.